Sewing machines are very useful in day-to-day work for stitching and sewing but for using this useful product you need to set it up first for better stitching. For this, we need to follow some basic rules of settings and operations too.
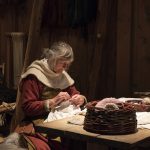
Initially, sewing machines were manufactured for garment factory production lines, with clothing becoming uniformly mass-produced. It had been French tailor Barthelemy Thimonnier who invented the primary functioning home appliance in 1830 to be used in his garment factory.
I think since may be a machine it’s accustomed to sewing faster. That’s what I used to be taught due to the economic revolution machines were made to try and do normal tasks faster and more efficiently, I suppose. But it’s also for stitching bigger pieces of cloth together easier.
Now there have been two basic types of sewing machines. The first one is the industrial sewing machine basically used for the mass production of garments and textile work. These sewing machines are heavily powered making them work in the bulk production of clothing and garments. These are really very fast and need a lot of power and other instruments to work efficiently.
The second type of sewing machine we have is the domestic one that helps you cover the smaller task of garments and textile production and is basically used at a lower scale. These basics use less power and don’t have any extra tools or instruments to work.
These two are the very two basic sewing machines that are used
How to set up a sewing machine as a beginner?
If you are new to working and operating the sewing machine, this is the best place for you to get yourself ready for a sewing machine setup.
Before learning how to use a stitching machine, it’s necessary to become aware of its key parts.
- Power Switch: Sometimes placed on the proper facet of the machine, the facility switch turns the stitching machine on and off.
- Foot Pedal: The pedal controls the stitching speed. Pressing down on the pedal permits you to begin a handicraft. Pressing more durable on the pedal makes the machine sew quicker, and pressing gently makes it sew slower.
- Spool Pin: The spool pin could be a tiny metal or plastic pin that holds the spool of thread. It will have a vertical or horizontal configuration, and it’s sometimes placed on the prime of the stitching machine.
- Thread Guide: The thread guide steers the thread from the spool pin to the winder. This tiny metal piece holds the thread and is typically placed on the highest right of the stitching machine.
- Bobbin Winder: The Bobbin-winder is typically placed on the highest right of the stitching machine. As the name suggests, its purpose is to wind thread onto the winder.
- Hand wheel: Sometimes placed on the proper facet of the machine, this massive dial is employed to manually lower or raise the needle.
- Stitch Selector: The sew selector dial permits you to settle on the active sew kind. On many more modern stitching machines, sew selector dials are replaced with liquid crystal display displays with touchscreen and/or button inputs.
- Thread Take-Up Lever: The thread take-up lever is typically placed on the highest left facet of the stitching machine. It holds the highest thread taut between the spool pin and needle.
- Needle Clamp: The needle clamp could be a tiny screw that holds the needle in position.
- Presser Foot: The presser foot is found adjacent to the needle. it’s the same as a little ski and might be raised and lowered victimizing the presser treadle. This piece helps hold the cloth in position while stitching.
- Needle Plate: The needle plate is a metal plate that is placed slightly below the needle.
- Feed Dogs: The feed dogs are tiny metal ridges placed on the needle plate. These mechanisms pull the cloth through the machine whereas stitching.
- Bobbin Cover: The bobbin cover protects the bobbin-winder within the sewing machine, holding it in position.
A sewing machine is a machine used to sew a fabric perfectly and that too with precision and without messing all around. There are many types of sewing machines such as
- Mechanical sewing machine
- Electronic sewing machine
- Automated sewing machine
- Embroidery machine
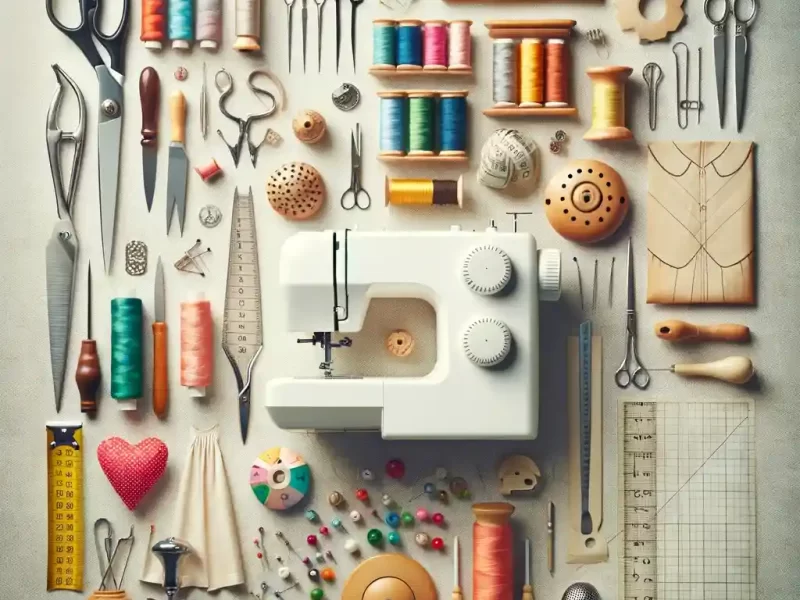
For perfect sewing, you will require a lot of side tools such as measuring instruments, cutting instruments, marking tools, Pins, a Pincushion, a Thimble, and many more tools.
Now here is the list of best fabrics used for sewing and stitching:
- Mettler silk-finished cotton thread
- Coats and Clark inc
Talking about the sewing thread size, the larger the number size the finer the thread is.
How to Make Sewing Machines Work Properly for Your Next Sewing
For setting up the sewing machine one should first go through the manual provided with the sewing machine for better ideas and accuracy.
Now you will need a steady table for the placing of the sewing machine which is also near to a power supply for good connectivity. Now select the type and color of thread you want for your cloth and pick that reel of that thread for using it in the sewing machine.
Now roll the thread around the bobbin and attach it to the sewing machine.
Now take a larger spool pin and remove the cap. The cap appears as a disc with a hole in the center. Now take your thread and place it in the spool pin and put back the spool cap. The thread is now attached. This process will stop the thread from getting entangled in between letting you sew properly.
Take the thread and wind it once around the bobbin and push the bobbin into place. Now by peddling the foot instrument you will wind out the thread into the bobbin and wind it until it is full. Now cut the thread and remove the spool. Take the bobbin and install it into the bobbin cover (the location for the bobbin cover may differ according to different machines, so use the manual for finding it).
Once the bobbin is installed, the next step is to thread the machine. Place the thread spool over the spool pin properly. Now, take one end of the thread and fill it through the threading guide (refer to the manual if any problem occurs), and place the thread correctly at its position.
Once the thread has been put at the exact location, it’s time to thread the sewing needle. Machines with the automatic feature of threading the needle are usually available, otherwise the same can be performed manually.
Both vestments need to be pulled out before you can start sewing. To pull the thread up from the bobbin, use your left hand to hold the needle thread tense. Turn the handwheel on the right side of the sewing machine with your right hand.
Give one revolution to the handwheel so that the needle can catch the bobbin thread and bring it up above the needle plate. The exposed bobbin thread should be spiraled. Pull on the circle to bring up the bobbin thread tail.
You will currently have two threads: one rib through the needle at the highest and one thread springing up through the needle plate at the very bottom.
You’re nearly able to begin stitching. Use the sew selector dial to decide on your required sew. To check if the machine is correctly ribbed, you shall run some stitches on a chunk of scrap material.
That would help you get a basic idea of how to operate the machine and how the machine is actually working.
When you’re ready to start stitching, get your piece of cloth prepared. the stitching machine needle ought to be raised, and therefore the cloth ought to be in line with the needle.
Keep the majority of the material on the left aspect of the machine for electric sander stitching. the exploitation of the presser pedal, lower the presser foot to carry the material in its desired place.
It’s time to begin sewing. Certify the lever is positioned well below the table. Hold the loose ends of the threads out of the approach for your initial few stitches; this may additionally forestall the threads from withdrawing into the material. Gently press the lever to begin stitching your initial stitches.
To keep the stitches firmly in position and stop them from being forced out, you may do a reverse sew (also referred to as backstitching) at the start and finish of every seam.
The feed dogs can move the material on after you begin stitching, therefore you merely have to be compelled to gently guide the material through the machine as you sew. Pulling or tugging the material will harm the needle, therefore let your textile machine do the work.
After many regular stitches, click or hold down the reverse sew button or lever. this may reverse the stitching direction. Reverse sew for many stitches (along wherever you only stitched) to secure the seam.
Securing the seam will help you get a perfect stitch on the garment and would be strong too
Switch off or take away your finger from the reverse sews management to revert to regular sewing. Continue stitching to the tip of your seam. Do some additional reverse stitches to secure the seam.
When you’re finished, use the hand wheel to lift the needle out of the material. Use the presser foot pedal to lift the presser foot and so take away the material.
Cut the threads to detach your project from the stitching machine, ensuring to depart a touch of thread comes back from the machine therefore you’ll be able to simply sew your next seam.
This was a basic idea of operating a sewing machine efficiently with the use of all the tools and instruments to produce good stitched garments and textiles. Sewing has always been a great machine for humankind.
Excluding all the modern inventions and transformations this will be useful forever and will always tend to be there for the best stitching and sewing of cloths and textiles whether it is for industrial use or for domestic production of stitched and sewed garments in the market.
I love sewing, I am sewing for the last 15 years and started this blog with the help of my niece to spread sewing-related guides all over the world.
Sewing could be a full-time profession or hobby, and I wish to make a change by adding more people to the sewing world.