Hello, fellow sewing enthusiasts! It’s Amelia here, ready to dive into the often-overlooked but absolutely vital aspect of sewing – pressing. 🌟✨
The Magic of Pressing in Sewing
- Transforming Sewing Projects: Over my years of sewing, I’ve learned that pressing can truly transform your work. It’s not just about ironing out wrinkles; it’s about shaping your creations and giving them a professional, polished look. Think of pressing as the fairy godmother of sewing – it can turn a pumpkin into a carriage! 🧚🎃
- A Stitch in Time… Needs Pressing: Every seamstress knows that a beautifully pressed seam can make all the difference. It’s like the difference between a homemade cookie and a gourmet biscuit. Both are delicious, but one just has that extra sprinkle of perfection. 🍪➡️🍪✨
Why the Right Tools Matter
- Enhancing Your Creations: Just as you wouldn’t use a butter knife to cut sewing fabric, using the right pressing tools is essential for achieving the desired finish on your projects. Different fabrics and techniques require different tools, from the trusty iron to the specialized clapper.
- A Press for Success: Each pressing tool has its role, whether it’s giving a crisp edge to a collar with a tailor’s ham or achieving perfectly flat seams with a clapper. It’s like having a toolkit for every culinary challenge in a kitchen – the right utensil makes the job easier and the results better.
So, grab a cup of tea, and let’s explore these fantastic pressing tools that can elevate your sewing from charming to absolutely enchanting. Stay tuned, and let’s press our way to sewing success! 🪡🫖
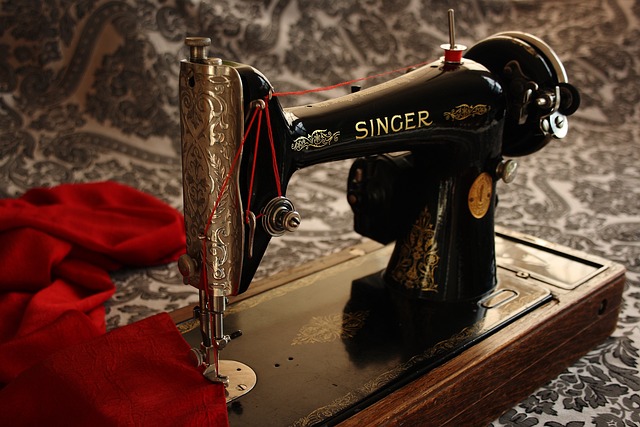
1. Traditional Iron: The Cornerstone of Every Sewing Project 🌟👗
Moving from our introduction into the world of pressing, let’s start with the most fundamental tool – the Traditional Iron. It’s been my steadfast companion in every sewing project, just as essential as my needle and thread.
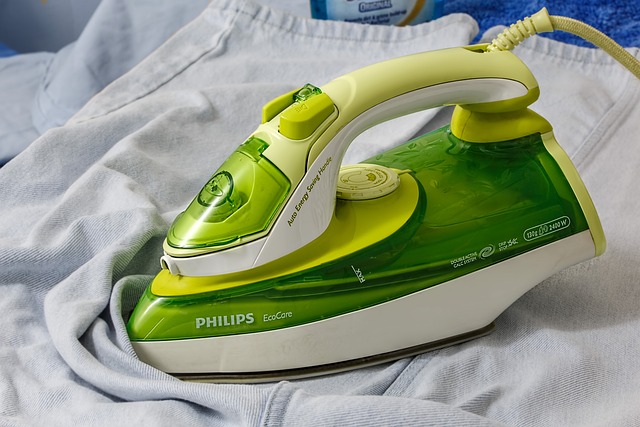
The Versatility of a Good Iron
- A Sewer’s Best Friend: Whether I’m working on a delicate silk blouse or a sturdy denim jacket, the iron has always been crucial. It smoothes, flattens, and prepares the fabric, making every subsequent sewing step easier. Think of it as the prelude to a beautiful symphony – setting the stage for what’s to come.
- More Than Just Smoothing: A good iron does more than remove wrinkles; it helps in shaping fabric, setting seams, and even creating new design elements like pleats. It’s like the magic wand that brings the fabric to its full potential.
Selecting the Perfect Iron
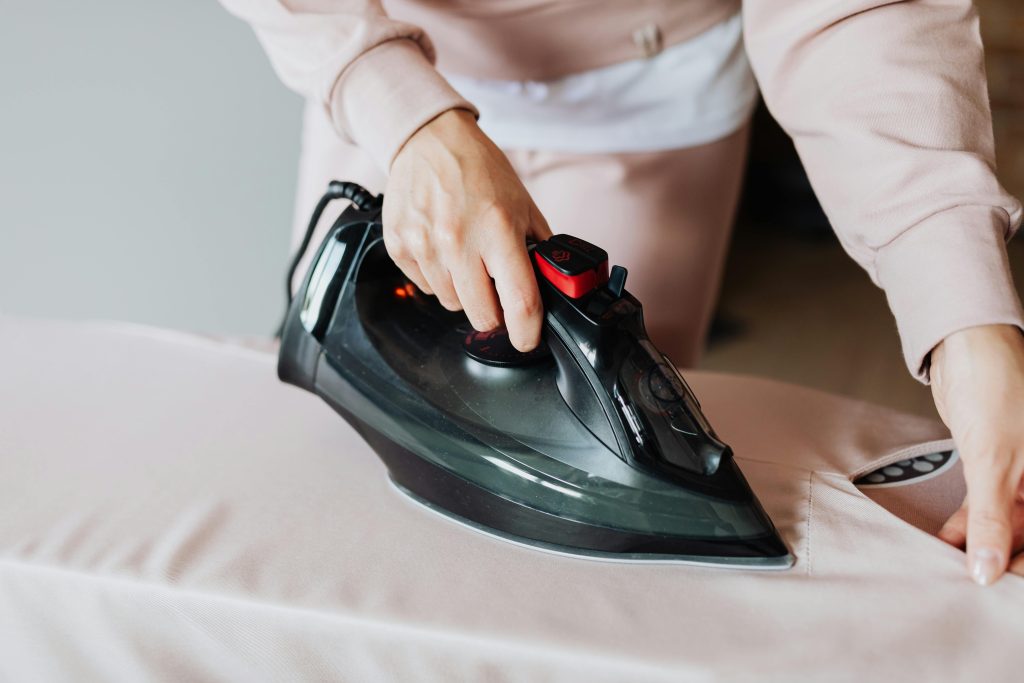
- Steam Power: When choosing an iron, consider its steam capabilities. Steam is a game-changer for removing stubborn wrinkles and giving fabrics a crisp, professional finish. It’s like having a mini spa treatment for your fabric!
- Heat Settings and Fabric Types: Different fabrics require different heat settings. A good iron offers a range of temperatures suitable for everything from lightweight chiffons to heavy wools. It’s about tailoring the heat to suit the fabric’s needs.
- The Soleplate Story: The soleplate’s material can make a big difference. Non-stick, stainless steel, or ceramic – each has its benefits and ensures smooth gliding over various fabrics.
As we carefully set down our iron, ready for the next pressing task, we’re about to step into the world of the Ironing Board – a tool that might seem mundane but is integral to our sewing journey.
2. Ironing Board: The Unseen Foundation of Perfect Pressing 🧱👚
With our trusty iron now back in its rightful place, let’s shift our focus to an equally important yet often understated tool in our pressing arsenal – the Ironing Board. Much like the stage for a ballet dancer, the ironing board is crucial for the flawless performance of our iron.
Stability and Adjustability: A Must-Have
- The Sturdy Platform for Pressing: Just as a painter needs a solid easel, the importance of a stable ironing board cannot be overstated in sewing. A wobbly board can not only make pressing a chore but also affect the quality of your work. It should be strong enough to withstand pressure yet light enough for easy handling.
- Tailored to Your Needs: The beauty of an adjustable ironing board lies in its versatility. Whether you’re a towering giant or a petite powerhouse, being able to adjust the height ensures you’re comfortable, preventing backaches and allowing you to focus on the pressing task at hand.
Choosing the Right Ironing Board
- Size Matters: Depending on your workspace and the projects you undertake, the size of the ironing board plays a significant role. For large projects like quilts, a bigger board is preferable, while a compact board might suffice for smaller garments and crafts.
- Cover Material Counts: The cover material can impact the effectiveness of your ironing. Options like heat-reflective covers can speed up the process, while a thickly padded cover ensures a smooth surface.
- Portability for Flexibility: If you’re like me, moving around as you sew, a portable ironing board can be a godsend. It allows you to set up a pressing station wherever it’s most convenient, be it beside your sewing machine or in front of your favorite TV show.
As we fold up our ironing board, appreciating its contribution to our sewing projects, we’re ready to move on to our next pressing tool. Coming up, let’s delve into the world of Pressing Cloths – a simple yet essential tool that protects and perfects. Stay tuned! 🌟🧵
3. Pressing Cloth: The Protective Guardian of Your Fabrics 🛡️👗
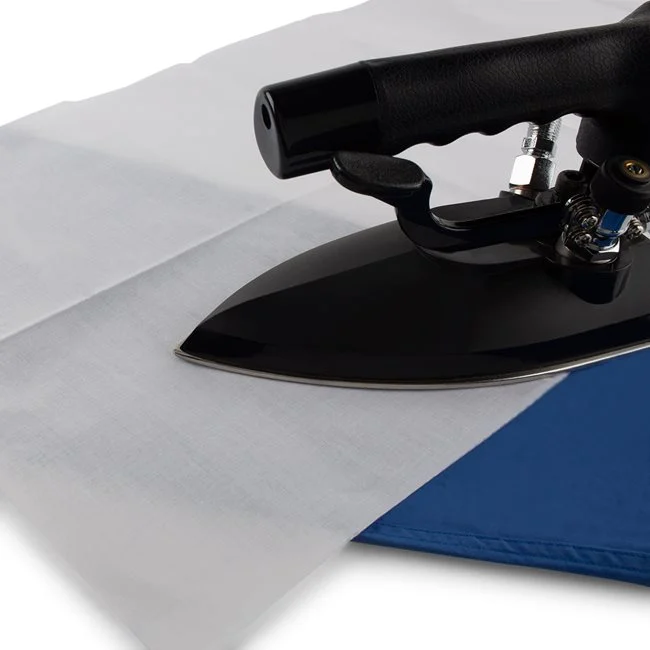
After appreciating the solid support of our ironing board, let’s turn our attention to a seemingly modest yet incredibly important tool in our pressing toolkit – the Pressing Cloth. Much like a shield in battle, the pressing cloth is essential for safeguarding our delicate fabrics from the direct heat of the iron.
A Layer of Protection
- Safeguarding Delicate Fabrics: Just as we use sunscreen to protect our skin from the sun, a pressing cloth acts as a barrier between the iron and fabric. It prevents scorching, shine, and other heat-related damages, especially on sensitive fabrics like silk, satin, or linen. It’s about caring for and preserving the beauty of our materials.
- Ensuring Even Heat Distribution: Using a pressing cloth helps in evenly distributing heat across the fabric, ensuring a smooth finish without direct contact with the iron. This can be particularly helpful for fabrics prone to water spots or heat marks.
Varieties of Pressing Cloths and Their Uses
- Choosing the Right Cloth: Different fabrics call for different types of pressing cloths. A cotton cloth is versatile and suitable for a wide range of fabrics, while a wool cloth is excellent for heavier materials like wool or tweed.
- Specialized Options: For synthetics or fabrics with a high sheen, a see-through pressing cloth allows you to see your work while protecting it. Teflon-coated cloths are also available for fabrics that require a low-heat setting.
As we neatly fold our pressing cloth, ready for its next use, we acknowledge its quiet yet pivotal role in our sewing projects. Coming up next, we’ll explore the Tailor’s Ham – a unique tool that brings shape and life to our garments.
4. Tailor’s Ham: Sculpting the Curves in Sewing 🌐🧵
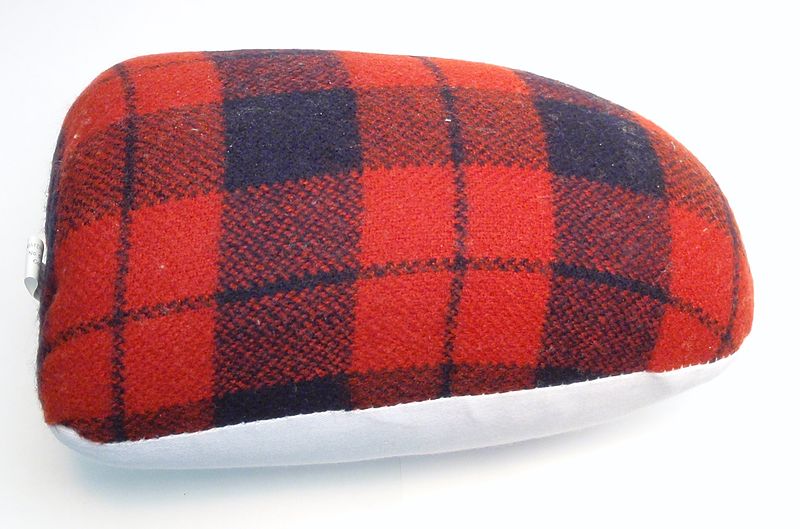
Having wrapped up the role of the pressing cloth in our sewing ensemble, let’s now roll into the world of the Tailor’s Ham – a tool that might sound peculiar but is an absolute game-changer, especially when working with curves and contours in garments.
Mastering Curves and Contours
- The Art of Shaping Fabric: In sewing, not all seams are straight and simple. The Tailor’s Ham, with its unique curved design, becomes indispensable for pressing curved seams and darts. It’s like a potter’s wheel for sewers, allowing us to mold and shape fabric into its desired form with precision.
- Bringing Garments to Life: When I first used a tailor’s ham for a jacket project, the difference it made was astounding. The darts had a more natural curve, and the seams lay beautifully flat. It’s perfect for tailored garments like jackets and dresses, where fit and fall are everything.
The Benefits of Using a Tailor’s Ham
- A Touch of Professionalism: Using a tailor’s ham can elevate your sewing projects from homemade to handmade with a professional touch. It helps in achieving those crisp, clean finishes that you see in high-quality garments.
- Versatility in Use: Whether it’s a contoured hip line, a rounded shoulder, or a sculpted bust area, the tailor’s ham conforms to various shapes, ensuring your pressing is as effective as it is precise.
As we set aside our tailor’s ham, appreciating its contribution to the elegance of our garments, we gear up to introduce the next pressing tool – the Seam Roll. This cylindrical wonder is key to tackling long, narrow seams and hard-to-reach areas.
5. Seam Roll: The Secret to Sleek Seams and Hard-to-Reach Areas 🌀👚
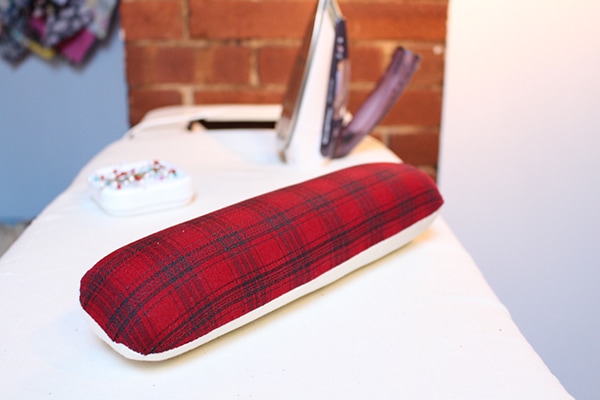
Moving on from the curved wonders of the tailor’s ham, let’s unravel the secrets of another pressing essential – the Seam Roll. This tool might seem unassuming at first glance, but its utility in the sewing world is unparalleled, especially for those tricky spots and slender seams.
Navigating Narrow Seams with Ease
- A Solution for Slim Spaces: The seam roll is a marvel when it comes to pressing long, narrow seams. Its cylindrical shape allows you to press seams without creating unwanted creases on the other side of the fabric. It’s like having a nimble assistant, helping you iron out every little detail.
- Reaching the Unreachable: One of the challenges in sewing is pressing seams and areas that are difficult to access. The seam roll effortlessly fits into sleeves, pant legs, and other confined spaces, ensuring every part of your garment receives the attention it deserves.
The Craft Behind the Seam Roll
- Materials Make a Difference: Commonly, seam rolls are filled with wool or cotton, materials known for their heat-absorbing properties. The outer layer might be cotton or linen, providing a durable and smooth surface for pressing.
- Why Wool and Cotton?: Wool is excellent for wicking away moisture, making it ideal for use with steam. Cotton, on the other hand, is perfect for high-heat pressing. The combination ensures that whether you’re working with steam or dry heat, your seam roll is up to the task.
As we gently roll our seam roll back into its spot, ready for its next use, we look ahead to our next indispensable pressing tool. Coming up is the Sleeve Board – a nifty tool that transforms the way we press smaller, intricate parts of our garments.📏👕
#6. Sleeve Board: The Mini Powerhouse for Detailed Pressing 👚🔍
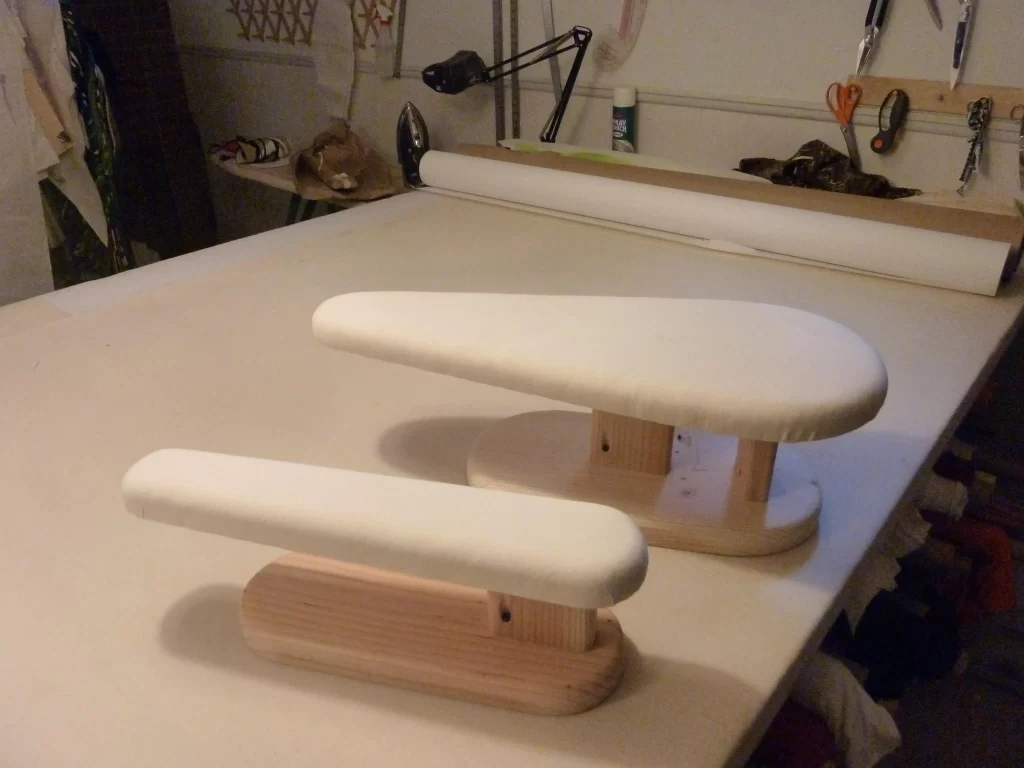
Having just explored the versatility of the seam roll, we now turn to a tool that’s equally pivotal for achieving perfection in smaller, more intricate sewing tasks – the Sleeve Board. This compact board is a gem in the sewing room, especially when dealing with sleeves and small garments.
Tailoring the Tiny Details
- Focused Precision for Small Garments: The sleeve board is like a magnifying glass for pressing – it allows you to zoom in on smaller areas. It’s perfect for pressing sleeves, children’s clothing, or any garment section where a traditional ironing board is too large and cumbersome.
- Achieving Professionalism in Every Crease: Just like how a small brush is essential for a painter to detail their artwork, the sleeve board lets you achieve those crisp, professional finishes on cuffs, collars, and other narrow parts of garments. It ensures that every inch of your creation looks polished and well-made.
Sleeve Board vs. Traditional Ironing Board
- Size and Maneuverability: Unlike the broader surface of a traditional ironing board, the sleeve board is narrow and dual-sided, allowing you to slide sleeves, pant legs, and other tubular garment parts over it easily. This prevents the formation of creases and wrinkles on the other side of the fabric.
- Convenience in Compact Spaces: For those with limited sewing space, the sleeve board is a blessing. It’s small, portable, and can be easily set up on your regular ironing board or any flat surface, making it ideal for quick pressing tasks or working in confined areas.
As we neatly tuck away our sleeve board, appreciating the finesse it brings to our smaller sewing projects, we prepare to spotlight our next pressing tool. Up next is the Pressing Mitt – a handy tool for on-the-spot pressing and working around tricky areas. 🧤✨
#7. Pressing Mitt: Your Handy Partner for On-the-Go Pressing 🧤🌟
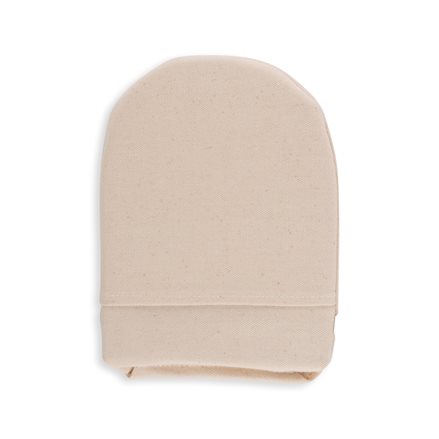
After exploring the precision offered by the sleeve board, let’s delve into another nifty tool that has revolutionized pressing in sewing – the Pressing Mitt. This tool is like the Swiss Army knife in the world of sewing; small, but incredibly versatile and handy.
A Touch-Up Artist’s Dream
- Quick Fixes Made Easy: The pressing mitt is perfect for those moments when you need to do a quick touch-up or press a small, intricate area. It’s especially handy for seams and corners that are hard to reach with a traditional iron or ironing board. Think of it like having a magic wand that smooths out wrinkles on the spot.
- Flexibility at Your Fingertips: Its design allows you to slip it onto your hand and use your own fingers to hold the fabric in place while you press. This can be a game-changer when working on areas that require a bit more finesse, such as pleats or ruffles.
Ease of Use and Convenience
- Portable Pressing Power: One of the greatest advantages of the pressing mitt is its portability. It’s compact enough to be tucked into your sewing bag, making it perfect for sewing classes, workshops, or even travel.
- Simple Yet Effective: Don’t let its simplicity fool you. The pressing mitt can be used on a variety of fabrics and is incredibly effective for its size. It’s a reminder that sometimes the simplest tools can be the most powerful in achieving great results.
As we carefully hang up our pressing mitt, ready for its next use, we turn our attention to the next essential pressing tool. Coming up is the Clapper – a traditional tool that might seem unassuming, but plays a crucial role in achieving perfectly flat seams and edges.
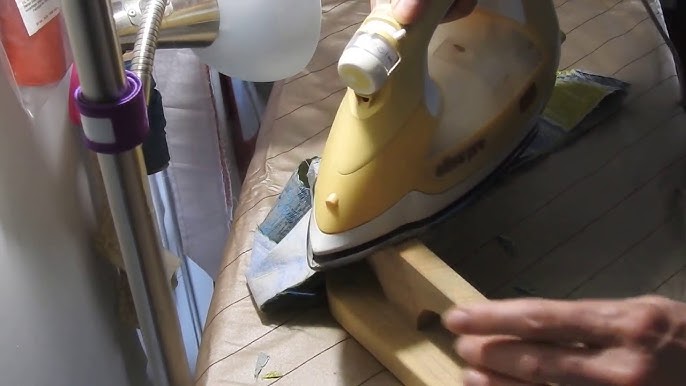
#8. Clapper: The Secret to Crisp, Flat Seams and Edges 🪵👌
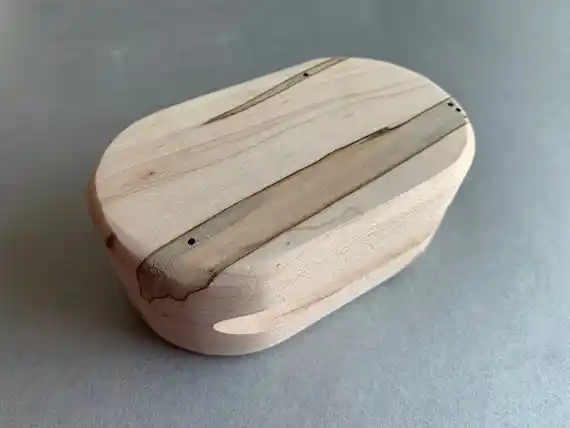
Gently setting aside our pressing mitt, we now embrace a tool steeped in tradition yet indispensable for modern sewing – the Clapper. This tool may have an unassuming appearance, but its impact on sewing projects is profound.
Flattening Seams Like a Pro
- A Mighty Tool for Bulky Seams: The Clapper is designed to flatten bulky seams, collars, and edges that a regular iron just can’t handle alone. It’s like having a magic presser in your toolkit. After ironing, simply press the clapper down on the hot seam, and voila! The heat and pressure work together to create wonderfully flat and crisp seams.
- From Bulky to Sleek: I remember working on a heavy wool coat where the seams were stubbornly puffy. The clapper was my saving grace – it transformed those bulky seams into sleek, professional-looking lines. It’s especially useful for fabrics like denim, wool, and other thick materials.
Maximizing the Effectiveness of the Clapper
- Timing is Everything: To get the most out of your clapper, use it while the seam is still warm from the iron. The heat retained in the fabric combined with the pressure from the clapper works wonders.
- A Simple Yet Skillful Technique: The beauty of the clapper lies in its simplicity. No buttons, no heat settings – just a block of wood skillfully shaped for optimal pressing. The key is to apply firm, even pressure for a few seconds to achieve that perfectly flat seam.
As we place our clapper back onto our sewing table, appreciating the age-old wisdom it brings to our projects, we gear up to introduce the next pressing tool. Coming up is the Point Presser – an ingenious tool for reaching and refining the smallest corners and collars 📐🧵
#9. Point Presser: Mastering the Details in Collars, Lapels, and Corners 🔍👔
From the broad, powerful press of the clapper, we now shift our focus to a tool designed for precision and intricacy – the Point Presser. In the vast ocean of sewing tools, the Point Presser is like a skilled navigator, guiding us through the intricate landscapes of collars, lapels, and corners.
Precision Pressing for Perfect Points
- The Artist’s Brush for Sewers: The Point Presser is specifically designed for those hard-to-reach areas that require detailed pressing. Working on a shirt collar or a lapel without this tool is like trying to paint a fine line with a broad brush – possible, but not quite perfect.
- Refined Finishes in Tight Spaces: Whether it’s the sharp corner of a pocket or the delicate curve of a collar, the Point Presser allows for precision pressing that gives your garments a professionally tailored look. It’s about adding that touch of finesse that elevates your project.
Utilizing the Point Presser Effectively
- Handling with Care: When using the Point Presser, handle your fabric gently. The tool is designed to do most of the work, so let it guide you. It’s about finesse, not force.
- A Tool for All Fabrics: Whether you’re working with light cotton or heavy wool, the Point Presser can be your ally. Its versatility makes it an essential tool in any sewer’s kit.
Frequently Asked Questions About Pressing Tools in Sewing
1. Can I use a regular iron for all my sewing projects?
While a regular iron works for most projects, specific sewing tasks may require additional pressing tools for better results, especially when working with delicate fabrics or intricate designs.
2. What makes a tailor’s ham so special for pressing?
A tailor’s ham is uniquely designed to press curved seams and darts, providing a more natural shape, particularly in tailored garments like jackets and dresses.
3. Why is it important to have separate scissors for paper and fabric?
Using separate scissors ensures that your fabric scissors remain sharp. Cutting paper can dull the blades, making them less effective for fabric.
4. Is a steam press better than a traditional iron?
A steam press can be more efficient for larger projects or for achieving a professional finish, but a traditional iron offers more control and is better suited for detailed work.
5. How does a clapper help in sewing?
A clapper is used after ironing to flatten bulky seams and edges, creating crisp and flat finishes, especially in thick fabrics like denim or wool.
Conclusion: Elevating Your Sewing with the Right Pressing Tools 🌟✂️
As we conclude our journey through the essential pressing tools in sewing, it’s clear how each tool brings its unique touch to our sewing endeavors. From the traditional iron, the foundation of pressing, to the specialized seam roll for those intricate areas, every tool has its special role in enhancing our projects.
Every Tool Tells a Story
- The Ironing Board and Pressing Cloth work in tandem to protect and perfect our fabrics, while the Tailor’s Ham and Seam Roll masterfully tackle the curves and corners. The Sleeve Board shines in refining smaller garments, and the Pressing Mitt offers quick and convenient touch-ups.
- The Clapper ensures our seams lay beautifully flat, adding a professional edge to our creations. The Point Presser brings precision to those tricky areas, and finally, the Steam Press offers a touch of modern efficiency for those looking to speed up their process.
A Toolkit for Success
- For those just starting out in sewing or looking to elevate their craft, incorporating these tools into your sewing routine can make a significant difference. They not only make the process more efficient but also enhance the quality of your work, giving it that professional, polished look we all strive for.
- Remember, sewing is not just about stitching fabrics together; it’s an art form where every press, seam, and hem tells a part of your creative story. These pressing tools are your allies, helping you shape and define your artistic vision into a tangible reality.
So, whether you’re a beginner or a seasoned sewer, consider giving these tools a place in your sewing space. Embrace the creativity and joy that comes with sewing, and watch as these tools help bring your imaginative designs to life with a touch of professionalism and finesse. Happy sewing! 🪡🌈✨

I love sewing, I am sewing for the last 15 years and started this blog with the help of my niece to spread sewing-related guides all over the world.
Sewing could be a full-time profession or hobby, and I wish to make a change by adding more people to the sewing world.